Monday, January 21, 2013
Wednesday, January 2, 2013
SAILOR and MERMAIDS
Welcome to 2013!
I want to thank you all for staying tuned in while I got the gallery up and running. Now back to work on sculpting.
The first piece I will post this year was suggested by The Mertailor https://themertailor.com/store/
It will be a re-creation of a scene from a well known movie but I will be altering it as not to infringe upon copyrights
Because the sculpture will be very complex, I will need to draw it out to get the armature correct.
Here are the things to be considered during the design stage:
1. How will the mermaids touch the base?
2. How will the boat be suspended?
3. How will the third mermaid be supported or attached to the set?
4. What will the base material be?
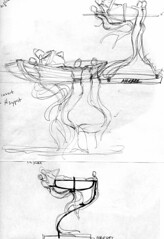
This sketch shows what the final piece should look like.
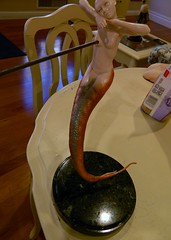
There will be two mermaids leaning on the gunwales of the dinghy. They will be the supports for the rest of the sculpture. Their tales will touch on a base of green marble which will have enough weight to keep this from tipping over. The boat will be supported by rods in the armatures of these two lovely ladies. The boat will then support the last mermaid and the sailor will sit in the boat.
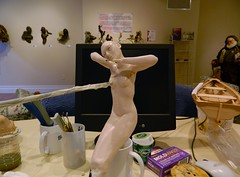
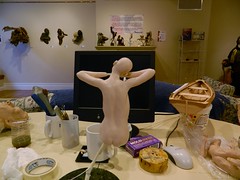
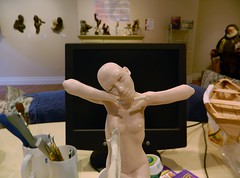
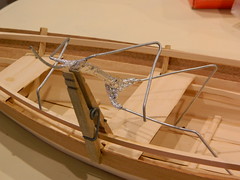
I start this piece by finding a wooden dinghy model which has the look I want. A few hours (and quite a few dollars) later, I have the majority of the model built so I can make the armatures for the figures to the proper scale. Note that parts of the boat are not in place yet since the supports for the boat and the last mermaids will need to be shaped and installed under the gunwales before it is finished.
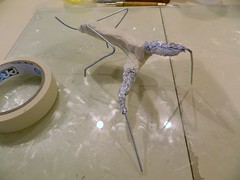
The armature is made following my basic armature layout which can be found in an earlier post on the blog. The armature is three 14 gauge wire pieces which are wrapped together with foil tape.
The armature is padded with foil to bulk out the armature so the over laying clay will be about 3/8" thick.
The foil and wire are then covered with masking tape to keep oxidation from being transferred to the clay.
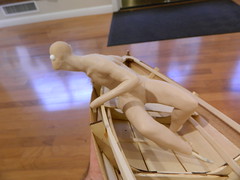
Clay is applied to the armature and detailed. The sailor will just sit in the boat so there is no need to add set pins to tie him into it.
More to follow. Have a great clay day!
Mark
I want to thank you all for staying tuned in while I got the gallery up and running. Now back to work on sculpting.
The first piece I will post this year was suggested by The Mertailor https://themertailor.com/store/
It will be a re-creation of a scene from a well known movie but I will be altering it as not to infringe upon copyrights
Because the sculpture will be very complex, I will need to draw it out to get the armature correct.
Here are the things to be considered during the design stage:
1. How will the mermaids touch the base?
2. How will the boat be suspended?
3. How will the third mermaid be supported or attached to the set?
4. What will the base material be?
This sketch shows what the final piece should look like.
There will be two mermaids leaning on the gunwales of the dinghy. They will be the supports for the rest of the sculpture. Their tales will touch on a base of green marble which will have enough weight to keep this from tipping over. The boat will be supported by rods in the armatures of these two lovely ladies. The boat will then support the last mermaid and the sailor will sit in the boat.
I start this piece by finding a wooden dinghy model which has the look I want. A few hours (and quite a few dollars) later, I have the majority of the model built so I can make the armatures for the figures to the proper scale. Note that parts of the boat are not in place yet since the supports for the boat and the last mermaids will need to be shaped and installed under the gunwales before it is finished.
The armature is made following my basic armature layout which can be found in an earlier post on the blog. The armature is three 14 gauge wire pieces which are wrapped together with foil tape.
The armature is padded with foil to bulk out the armature so the over laying clay will be about 3/8" thick.
The foil and wire are then covered with masking tape to keep oxidation from being transferred to the clay.
Clay is applied to the armature and detailed. The sailor will just sit in the boat so there is no need to add set pins to tie him into it.
More to follow. Have a great clay day!
Mark
Monday, August 27, 2012
Thursday, August 23, 2012
Saturday, July 7, 2012
Thursday, June 21, 2012
HERE WE GO!
I will try to include as many details and tips as I can while doing this piece. Feel free to ask details if I miss something.
For complex sculptures; in this case a cantilevered figure, pre-planning is essential for strength.
Here is a very fast sketch of the concept for this piece.
The main support
Neck and right leg part of the armature
The two parts of the armature are joined with foil tape.
For complex sculptures; in this case a cantilevered figure, pre-planning is essential for strength.
Here is a very fast sketch of the concept for this piece.
This overlay shows the armature inside the figures.
The main support (black) is either a rod or series of wire and tubes which will support the two figures and will run from the base through the body of the bird to end as a socket for the support in the hand of the child. In this case I used a 14 gauge wire inside a 5/32 brass tube as the main support.
The rest of the bird armature is a 14 gauge wire which will be attached to the main support (red).
Support for the child is a simple wire armature (if you are not familiar with this, look in the older posts on the blog) with a 3/16 tube over the left arm wire which slips over the end of the main support tube (orange).
Neck and right leg part of the armature
The two parts of the armature are joined with foil tape.
An additional brass rod is taped to the knee joint to add more support.
More to follow in days to come.
Thanks for looking, have a great day!
Mark
Monday, June 11, 2012
Subscribe to:
Posts (Atom)