

Okay, the snow blower has died so I just finished clearing the driveway by hand. Onto the work of the day!
If at first you don't succeed... Here is another failure which I felt was important to share. Would not want you to think that all you are getting is the best of my work. I did the first paint job on this guy last night using my regular acrylic washes. Decided that I wanted a different color for a woodland creature, more earthy. So I cleaned him off and started again. This time I decided to use oils. Thought I had it until this morning when I looked at him in the daylight instead of my studio lights. Epic failure number two. Too earthy! Even a bit too red. So now it was back to the start again. I decided this time to take you through the steps with me.


I add 2 parts Raw Umber to the mix and use that on the lower part of the leg. This is blended up into the upper leg.


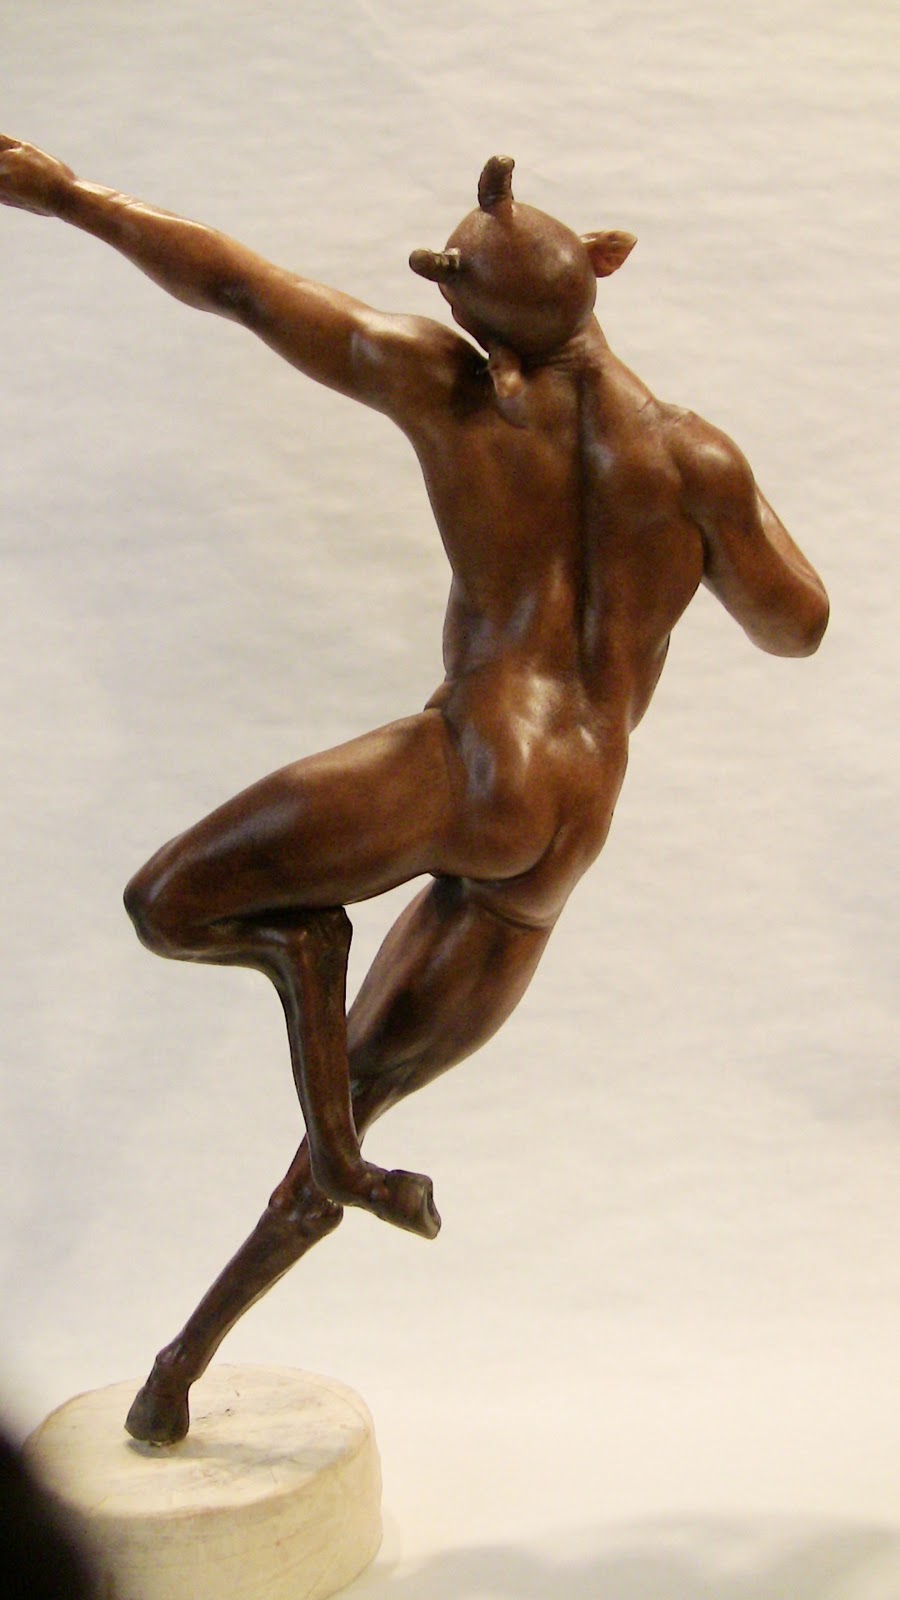
And the back. I have darkened the back of the elbow, the spine, the crack of the backside, and base of the neck.
He will now go into the oven at 170 for 2 hours to accelerate the drying process so I can do the next step in the paint job. More on that later today (?) Maybe after a nap!
Have a great day!
** This is wet paint. The color will shift when it is dry. It will also lose the sheen.
ADDENDUM !!!
Wanted to add these since they are part of the painting for today. Sorry, I am working then posting in real time these days to keep up.

The next step is to polish the surface with a soft cloth. This will add a slight sheen to the skin just like ours. It also removes any wet paint so if in doubt, wait a few days to do this!


Next we will look at the eyes. Tata!

for those of us who have to lay our work down to bake them, how do you suggest handling this? won't laying it on a bed of fiberfill or a washcloth (a)keep the paint from curing, or (b) rub some of it off? I know you can just leave this to dry on its own, but I know some people use heat set oils. I use a heat gun on the face, but I can't seem to get the body to cure completely, and suffer the above problems. Suggestions? Thanks!
ReplyDeleteMark, do you ever sand your pieces? If so, how do you do it?
ReplyDeleteMany thanks, as always.
carla
Bev, The water mixable oils will dry and set by themselves with out the oven but will take days. You can use the heat gun to dry/set them. It takes a few minutes but then should wait a few days to be sure before moving on.
ReplyDeleteHeat set oils are designed to set at a low temperate so again, the heat gun will set them. If you are concerned, set with the gun then lay on fiberfill (not a washcloth as it will rub off paint)and place in the oven. You will not hurt the paint by drying too long.
Carla, I do sand the women. I will be doing her next and will explain.
BTW, the female in the first photo is a sample I sculpted from one of the barn classes. She has been hanging around for a few years now- can't decide what she wants to be so she is a stand-in when needed.
Thanks Mark, I'll give that a try - previous attempts at completely setting a full paint with just the heat gun have failed. I'm sure it's a matter of practice with the gun (tricky to set the Genesis, but not scorch the figure). Part of my problem with using the gun is (I'm sure) due to the fact that my figures are small, and thus more prone to scorching fingers and noses.
ReplyDeleteLovely work! =)
ReplyDeleteI have a question though, which comes from my repeated disasters with oven-drying my painted sculpts. Would this be 2 hours at 170 Farenehit or Celcius? Sounds like a stupid question I know, but after following the instructions for genesis paints exactly and ruining a sculpt I was quite proud of, I am so worried about trying this technique with other paints too, and that sounds like a very long time in the oven...?
Thanks if you have time to reply...
~Alex