Welcome to 2013!
I want to thank you all for staying tuned in while I got the gallery up and running. Now back to work on sculpting.
The first piece I will post this year was suggested by The Mertailor https://themertailor.com/store/
It will be a re-creation of a scene from a well known movie but I will be altering it as not to infringe upon copyrights
Because the sculpture will be very complex, I will need to draw it out to get the armature correct.
Here are the things to be considered during the design stage:
1. How will the mermaids touch the base?
2. How will the boat be suspended?
3. How will the third mermaid be supported or attached to the set?
4. What will the base material be?
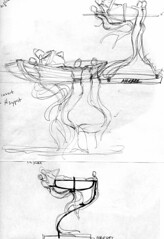
This sketch shows what the final piece should look like.
There will be two mermaids leaning on the gunwales of the dinghy. They will be the supports for the rest of the sculpture. Their tales will touch on a base of green marble which will have enough weight to keep this from tipping over. The boat will be supported by rods in the armatures of these two lovely ladies. The boat will then support the last mermaid and the sailor will sit in the boat.
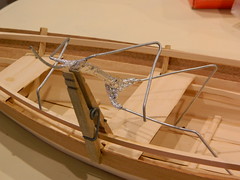
I start this piece by finding a wooden dinghy model which has the look I want. A few hours (and quite a few dollars) later, I have the majority of the model built so I can make the armatures for the figures to the proper scale. Note that parts of the boat are not in place yet since the supports for the boat and the last mermaids will need to be shaped and installed under the gunwales before it is finished.
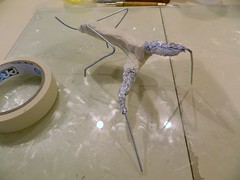
The armature is made following my basic armature layout which can be found in an earlier post on the blog. The armature is three 14 gauge wire pieces which are wrapped together with foil tape.
The armature is padded with foil to bulk out the armature so the over laying clay will be about 3/8" thick.
The foil and wire are then covered with masking tape to keep oxidation from being transferred to the clay.
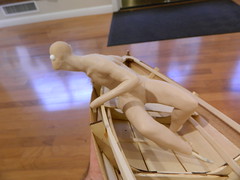
Clay is applied to the armature and detailed. The sailor will just sit in the boat so there is no need to add set pins to tie him into it.
More to follow. Have a great clay day!
Mark


So going to enjoy you posting WIP of this. You are an awesome artist.
ReplyDeleteSmiles,
Regi
Acompanharei com muita ansiedade a finalização desta obra.....
ReplyDeleteNós aqui do Brasil parabenizamos a vc pelo seu grande talento...
Rubens Rabello Filho - Brazil
Accompany you with great anxiety the completion of this work .....
DeleteWe here in Brazil we congratulate you for your great talent ...
Rubens Rabello Filho - Brazil
Love the idea and the realisation is looking already great ♥ ! Have a beautiful year 2013 !
ReplyDeleteLooks great. But it's really hard to see. The pictures are so tiny when you click them. Isn't there a way to post them a bit larger ?
ReplyDeleteLooking forward to seeing you make this one Mark !
Claudine
Hi Mark. First ... have a wonderful, healthy and creative 2013! I look forward to seeing this piece develop. It's very intriguing.
ReplyDeleteTonia
I am passionate about the work so thorough, weight apologies if not understand what I intend to be talking not speak English because I am Brazilian and Portuguese my language some time as you follow some edges, and I love each new piece, just today found your blog and with a quick skimming that I was amazed with your work. I also do some things to put raw material that I found here is not good and you happen to not sell or know of reliable place would post here to Brazil.
ReplyDeleteLooks like a fun piece to work on! I never thought to bulk the armature with foil and seal the foil with masking tape, I will have to try that. Thankyou! I do enjoy your blogs.., the pictures are great!
ReplyDelete~Middreamers
Lisa O..
Awesome! Thank you for showing the process :-)
ReplyDelete