Thursday, January 27, 2011

NYMPH (costume)

Well, as I was searching the boxes of fabric for Leprechaun clothes last night I found some clothes which the nymph as gracious enough to try on. She liked them so here is the bit of info about her bit of clothing.
I decided that the general feeling of this piece was a bit classical Grecco/Roman so I an going with the common depiction of the nymph as a nearly naked young maiden with diaphanous wrappings rather than a winged creature.

 The fabric is a light tan silk scarf which some wonderful person or machine was kind enough to hem with a 1/8' hem all around. I cut off a quarter of the scarf and spent forever slipping an 18 gauge wire into the hem.
I have a triangle shaped piece of cloth with wire on two edges now. One  corner without wire goes from the waist over the shoulder and back to the waist in the front. The wired edge wraps around the waist and attaches to itself.
The wire is posed to hold the cloth away from her body on the left side.
 The rest of the cloth is turned under itself and tacked to points on her body to hold it in the position I want.
On top of the tan scarf I added strips of a white scarf which has had its edges fused with a flame. The white cloth is used as an accent sash which wraps around her waist and hangs in the front and back of her legs. It breaks up the tan color as well as hiding the wire at her waist a little more. I hope to finish the final details today and mount them on a base for our next meeting. First, I need to finish shoveling the ten inches of snow in my loooong driveway! Have a great day!

Monday, January 24, 2011

NYMPH (painting, hair)

Worked on the nymph yesterday between attempts at fixing frozen pipes in Kelly's shower. Nymph went fine, pipes -not so much.
 The first thing I needed to address was the imperfections in her skin. I have a few moonies (4) thanks to my moist hands and the fact that this has taken so long to sculpt. I find that the longer a figure sits around before curing, the more dirt and moonies I end up with.
She has a depression by her navel which I made with a skewer before curing.
Wet the area of the repair with a thin layer of liquid Sculpy.
 Fill the void being sure to feather the repair into the surrounding surface.
Cure with the heat gun about six inches away from the surface. Keep the gun moving as you set the new clay to avoid overheating. This takes about 30 seconds to cure.
 Repairs done, now on to prepping the surface. I prefer to sand my females but leave the males a little rough. Using a coarse foam sanding block, sand all the large surfaces. As you sand, be sure to do so in different directions so you do not flatten the curves of your sculpture.
 A thinner foam sanding pad will conform to the small curves for more detailed sanding after the bulk of the body is done with the large block.
Sanding should be fast if you have smoothed as much as possible before curing.
BE sure to support your figure as you sand especially the arms and legs or you can crack them.
Brush off all the sanding debris and rub the entire surface down with acetone on a white cotton rag to polish out any scratches from the coarse sanding blocks.
**Please note the gap between her knees. Her legs were touching when she was sculpted. In fact, the left leg has an indentation where the right leg was pressed into the clay and formed around each other slightly. As the figure was cured, the legs relaxed and spread.  Normally, I would leave this as is but the depression is too obvious so she needs to be adjusted. I will do this with the heat gun later in the process.
Now that the moonies are repaired and the surface is smooth I will use the heat gun and superheat the entire figure. I am doing this because the stress on her is incredible and would result in a crack within a year or two if not addressed now. I start at the feet and work my way up the figure as I hold her in my hand. Once I get to the waist I place her on the Satyr's support rod and continue to superheat the spine and arms as she  hangs. This lets the clay relax and the armature supports the weight of the figure. When the clay cools, the stress will be carried by the armature not the clay. **The last thing I do with the heat gun is go back to the hips and waist and keep gradually heating them from side to side. Once the hips are soft enough to press in with my thumbs, I bend the legs back together and wrap them from mid thigh to knee with a piece of old T shirt to keep the knees together. When she cools completely, I unwrap the legs and the knees stay together again as you can see in the second picture down from here. Don't rush this process or you will have a crack to repair later on.
The nail beds are wet with liquid Sculpy and translucent clay is added to the nails them cured with the heat gun.

She is painted in a series of acrylic washes.
 Eye make up and brows are added. Fingernails are painted. Inside of mouth and lips are done as well.
** Note the knee location compared to the earlier photo. This tip alone is worth the cost of admission:)
 Cleaned, posed, and painted. Onto hair.

(He did get his goatee and a little chest hair as well as some real hair eyebrows.)

She got some golden blond wool for her hair which I then did a messy french braid on to make it a little more controlled but playful.
Bad pic but shows the braid without it being too perfect. She is playing in the woods after all!
Finnished for the day. On to some dressing and eyes next.
Thanks for stopping by and have a great day!

Friday, January 21, 2011

SATYR (hair)


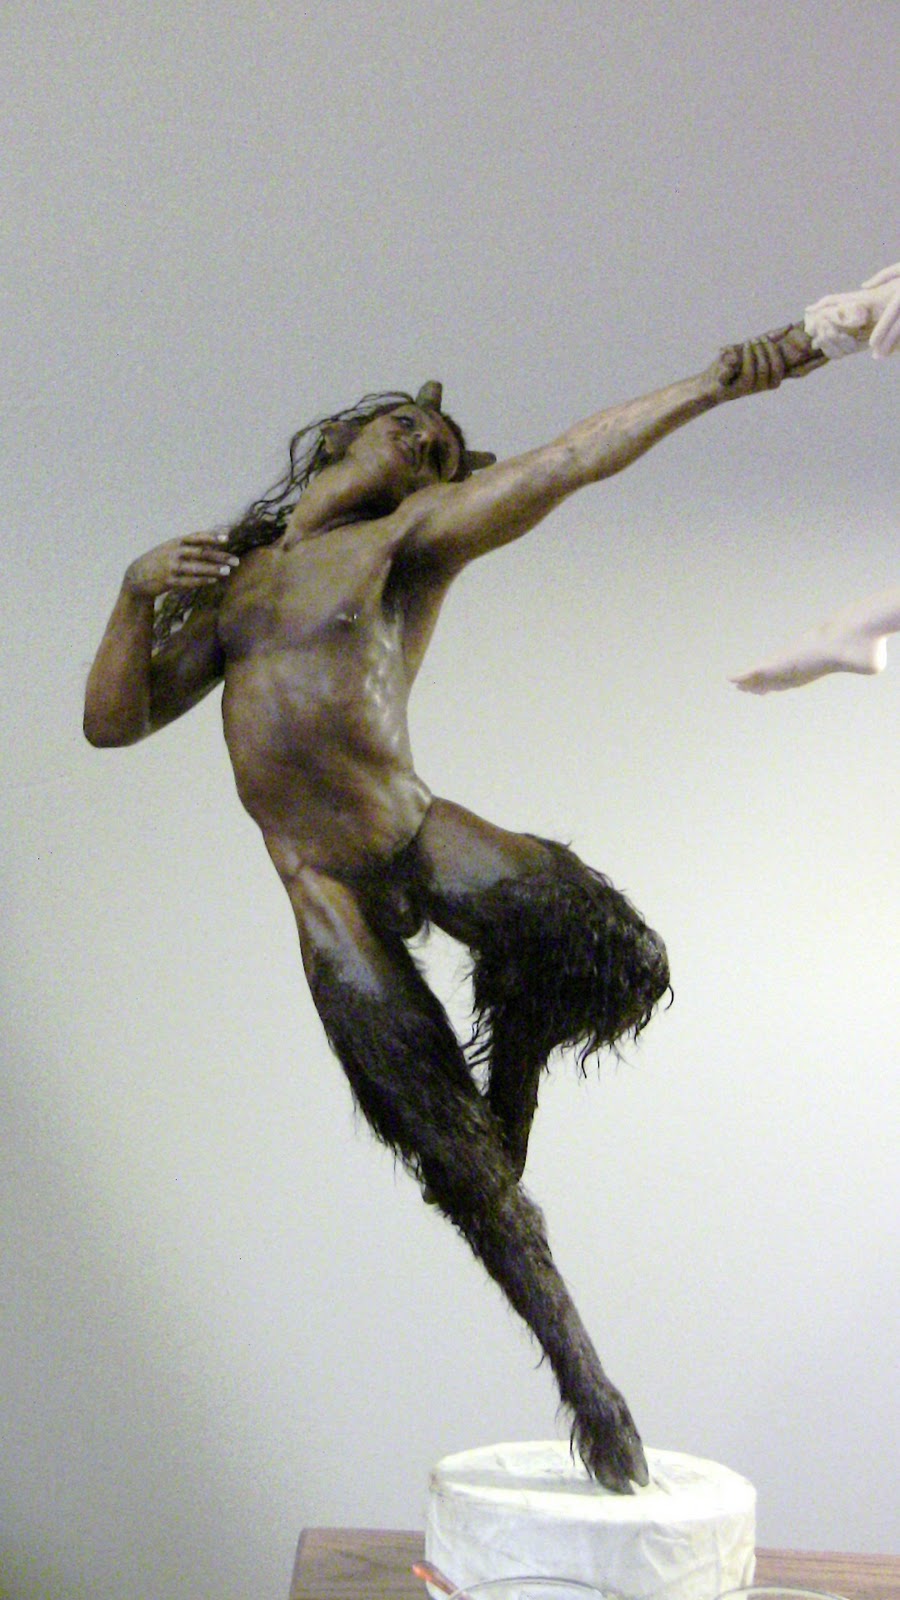
Lets take a quick look at the hair.  I have visited a neighbor's pasture and spent some quality time chatting with his goat to get the hair the way I want.
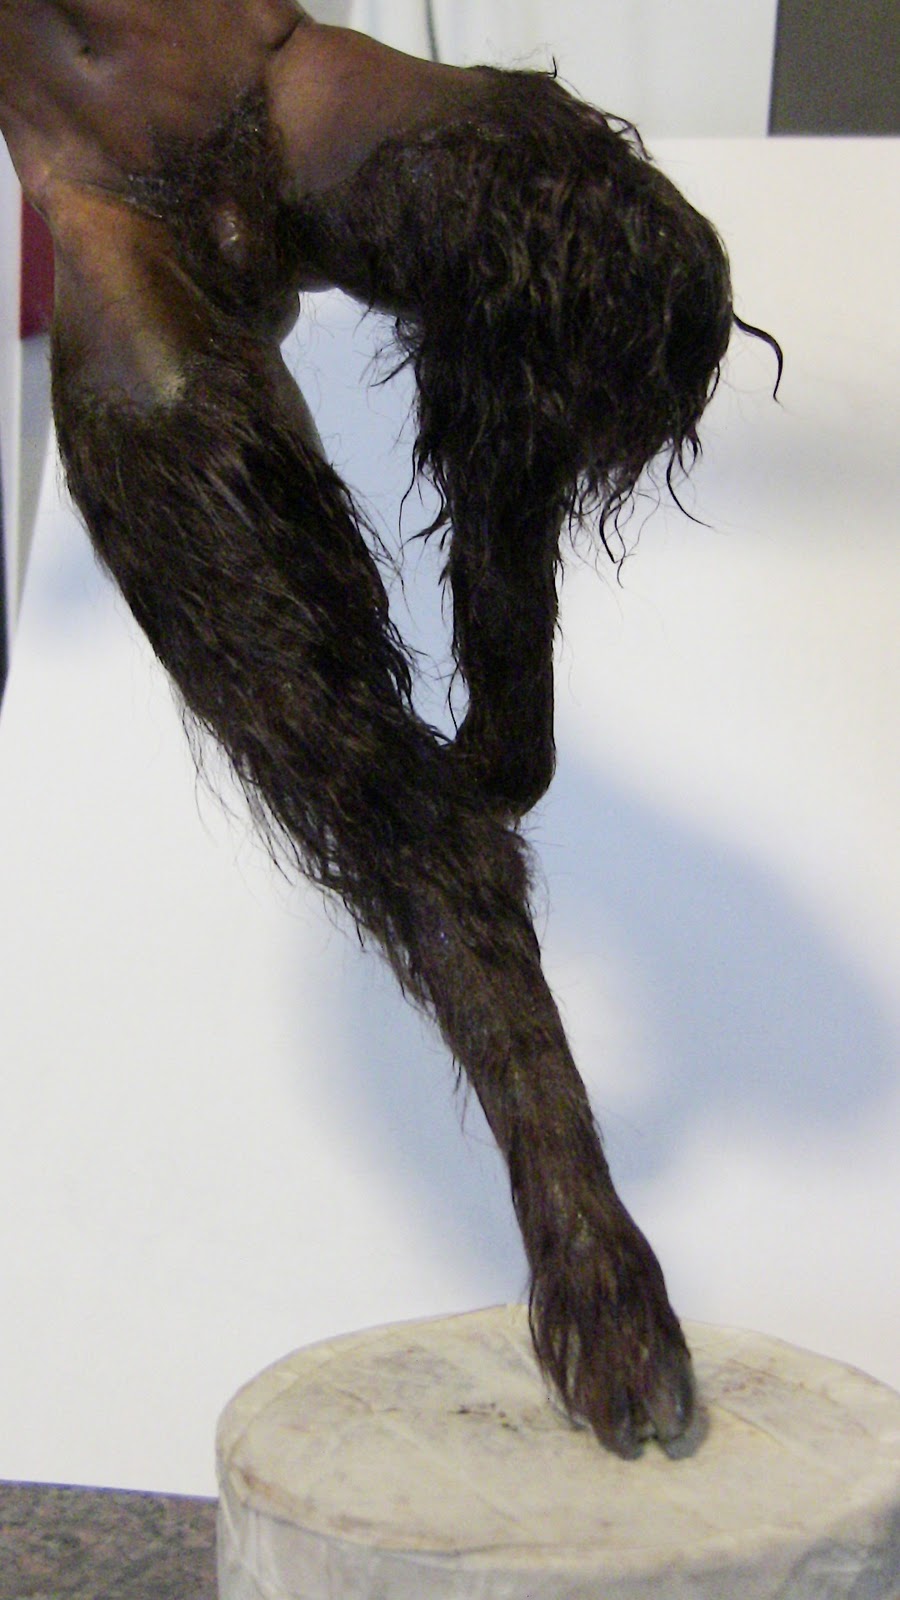
 I am using a chocolate colored lambs wool for the hair. This works well because the the base of the lamb's wool is straight while the tips are curly. This lets me have both types of hair on the legs without having to iron the hair to straighten it or curl straight hair. It also has a consistent color match since I use the same dye lot.

Hair has different growth patterns which vary with different species and at  different places on the body. The goat's hairs run in a rather parallel linear pattern down the leg. As you get closer to the hip area the pattern can develop a swirl or loop pattern but we are not going up the leg that far.
The lower leg will have shorter, straight hairs while the mid leg and thigh hairs are longer and curled.
Starting above the hoof, I lay a bead of glue around the leg and press 1/2' long hairs into the glue. This is repeated up the leg until I pass the first joint.
* To get the layers of hair to look staggered and more natural, place the hair in the glue them slide the hair up the leg slightly as you attach. The lower layer of hair will stick and stay; the upper layers in the clump will slide over the lower layers before grabbing into the glue.

 
 The hair above the hoof and at the back of the leg are left long while the rest of the lower leg hairs are trimmed in an irregular pattern to avoid the look of straight layers.
Just a personal preference note here: I wanted the lower leg to look very thin so it accentuates the goat leg. I think a fuller layer of hair makes the leg look like a human leg with a hoof on the bottom so I am trimming this very close to the clay.
The mid and upper sections of leg are done the same way but with the longer curly sections of the wool.
The exposed end of the hair (where the hairline and the leg transition to skin) is laid in one thin row at a time and blended into the skin. The darker shadowing we painted before is now extended up the leg a bit so it looks less like a set of chaps on our guy. Wouldn't want you thinking he is one of the Village People. (If you don't get that reference, you are too young!)
I used a super hold hair spray to give n oily look to the hair and to get it to pose the way I want. (Avon Advance Technique Volumizing Spray Gel) Soak the hair and you have about five minutes to pose and style it. Give a great "sweaty man" look to hair. (Come on ladies you know...Lord of the Rings, Pirates, Uh huh!)
The hair on the head is done as detailed in the Tristan blog but left log. He gets stylish sideburns to complete the style. Once again the hair is sprayed and styled. Still pondering a small goatee without mustache for him.  Any thoughts?
Eye lashes are added using the straight brown hairs of the same pelt.
Hair is added to the armpits and groin areas. (no spray, no styling- that would just be weird)
That's it, thanks for tuning in. Have a great day!

Wednesday, January 19, 2011

SATYR (eyes)

I will do my best to show you how I do eyes. First the beads need to be scraped clean of the layer of paint. A quill or tooth pick works fine for this.
A drop of alcohol is used to clean the eye ball to prepare for the enamels.
 The eye color is chosen. Here I will use a light blue eye to contrast with the skin tone. I start with a dark blue glass painting enamel which is found at the local craft shop. The Iris of the eye is painted with attention paid to the focal point of his gaze. I want to be sure he is looking at the nymph when this is done.
While the dark blue is still wet, I mix some white into the blue on a palette and paint the inner part of the iris leaving a ring of the dark blue on the outside.

 I then stipple the light blue of the iris with gold enamel to catch the light.
The pupil is painted in with black.


The eyes are left to dry for an hour then heated with the heat gun to set the enamel. Once again they need to cool completely and the finished eye is covered with a clear sealant to give the corneal bulge over the iris. The sealant also gives the eyes a wet look where it touches the eyelids.
I used to paint the eyes and insert them but prefer to paint last so i can change the focus if I change my mind.
Have a great day!

The madsculptor blog: WHY?

I want to thank so many of you for following, dropping in, or working along with this blog.
This blog was started as a way of giving away some of what I have been given over the last 30 years in theatre, fine arts, and now in art doll making.

I enjoy nothing more than helping new artists get started or helping established artists find a new way to see or approach this art form. As such, I have encouraged you all to sculpt along with me as a tool for you to understand my approach to this medium.

This "sculpt along" concept was my attempt at showing my approach to my techniques based on my designs. I hoped that artists would take the concepts and create his or her own artwork based upon those concepts as he or she developed a unique piece. I never intended to have my work copied inch by inch.

I am finding out that this is not the case and I assume full responsibility for this mistake on my part.

I hoped to create a balance between giving all the information which I can without giving away my livelihood which is based upon my unique sculpting style, my classes, and my books and DVD's. I couldn't care less if I sell another book or DVD. (my publisher does!) However, I was hoping to see other artists work appear based on the principles of a suspended piece. My fear is that in a few weeks there will be a flood of copies of my work hitting the market which will limit my ability to sell my art at the price I have worked so hard to establish.

I am appealing to all of you working along to take and use this information but to alter the sculpt design to make this your unique piece as many of you have. If you feel the need to duplicate my design in order to gain experience, I fully understand. All I ask of you is that you keep the finished piece as a study model for yourself alone. Please do not then sell that copy as your work of art.

I have heard from a number of you regarding this issue and want you to know how much I appreciate your support and understanding.

WRAP UP ON TRISTAN AND ISOLDE

Sometimes it takes a awhile for the wee beasties to tell me what they want to be. I have finally had a chat with these two and decided on a direction to take. This was influenced by a 3AM viewing of "King Arthur" the other night when my cold kept me from lying down all night.

I went back to the original concept of the design which is the captured moment between our hero and his leading lady as she has nursed him back to health after a battle. I decided to add the battle scars to him so he is a little less than beautiful. Here we go.

So, this is my finished sculpture. And this is what goes through my head as I finish them:
They are seated on a bearskin  on the floor. She has her outer cloak under and slightly around her for as much modesty as one can get in a moment before or after an encounter with a lover.
She is pale since she wears so many layers of clothing daily.
He is naked since modesty is not one of his virtues; however, his private parts are well hidden in the nap of the rug. He is bandaged and shows the abuse which battles have wreaked upon his body.

THE PROCESS

I have taken a wooden base which fits the figures. I want some open space around them but not enough that it distracts from the figures.  I then glued a raccoon pelt to the base. Please do not get up in arms. I believe in the sanctity of all life but this little guy was killed years ago and made into a woman's coat. I have honored him by giving him a new purpose rather than being destroyed. I used raccoon because the hair resembles the hide of an old Grizzly Bear.
This fur is out of scale with my figures. If it were actual size. the hairs would be about a foot long. I want to shorten them and give the impression of a used, matted, hide which has been slept on for years.
 To shorten the hairs I could shave the pelt or do what I did which was singe the hairs with the heat gun. The hairs shorten and mat down rather convincingly with this technique. The hairs are about 3/8" long now.
 The finished rug. I like my pieces to extend beyond the frame of the base when possible. This is a design concept I use in the theatre quite often when the set and the scene extend beyond the Proscenium wall into the audience space. Here I have let the pelt fall over the sides of the base in places. The cloak and the figures will do the same later.
Her outer cloak is a basic three piece design using an outer layer, lining, and an attached hood. The outer layer is quilted material and the inner is a rusty-red coarse spun cloth. they are sewn together, turned right side out,  the hood is attached, then a pale gold trim is attached to the front edge of the hood, and a decorative but muted trim is attached to the hem of the cloak.


 To get the proper size for the cloak I use an old sculpture of the same size as my dress form.

 The colors are kept in the earth tones as not to detract from the focus of the figures. Gold accents are used to show that she is of higher social status than the normal garb of the laborers of the time period.
The cloak is posed and glued to her so they will travel together.
He gets wraps on his ribs and wrist which are made of a coarse natural-colored linen.  The wrist wrap on our male is attached on the arm and the hand so the wrist can move to allow the female to slip her hand under his.

The final step is to dirty him with a Raw Umber wash over parts of his body which would hold the dirt and grime of wearing armor and clothing. Much like a mechanic's permanently soiled hands, the daily wearing of dirty clothes and heavy armor would grind the dirt into the pores of his skin and would not wash out easily. I have also added bruises of various ages. Fresh bruises are swollen and red as the blood seeps into the skin from damaged capillaries. Once the blood flow stops, the blood trapped in the skin will start to dry and shift to a number of colors from brown to deep blue (black and blue). The color shift will depend upon a number of factors. Soft tissue (such as around the eye socket) will hold more blood. The color become deeper blue to black in these areas. Skin over muscle or bone will hold less blood so the color shifts more to brownish reds. The third stage of bruising is the absorption of blood into the body. This is marked by the colors of pale browns to greenish yellows.

All these painting touch ups are subtle as not to detract from the full piece.
I have used layers of these colors in some areas to show that this is not a one time fight but that he is by profession a warrior. I assumed he is right handed so his left wrist and forearm have the bulk of older bruising from repeated stress of the shield on that arm being smacked by a sword.
 His left-side ribs and the left side of his face get heavily bruised as well since that is the defensive side of his body.
I hope you come away from this blog today with more of an understanding of where my mind goes as I create. Scary isn't it!
Have a great day!

Tuesday, January 18, 2011

SATYR (painting)

Good icy morning to you all! We had an inch of snow followed by sleet, then rain. Good day to sculpt. If only I did not have this miserable cold! This is the view outside my studio window this morning.
Okay, the snow blower has died so I just finished clearing the driveway by hand. Onto the work of the day!

If at first you don't succeed... Here is another failure which I felt was important to share. Would not want you to think that all you are getting is the best of my work. I did the first paint job on this guy last night using my regular acrylic washes. Decided that I wanted a different color for a woodland creature, more earthy. So I cleaned him off and started again. This time I decided to use oils. Thought I had it until this morning when I looked at him in the daylight instead of my studio lights. Epic failure number two. Too earthy! Even a bit too red. So now it was back to the start again. I decided this time to take you through the steps with me.

I was shooting for a color like the female here however, I broke my own rule of painting which is not to paint at night. 
 A little work with acetone, a rag, and a stiff brush and we get back down to the basic clay again. Don't be afraid to start over if you mess up!
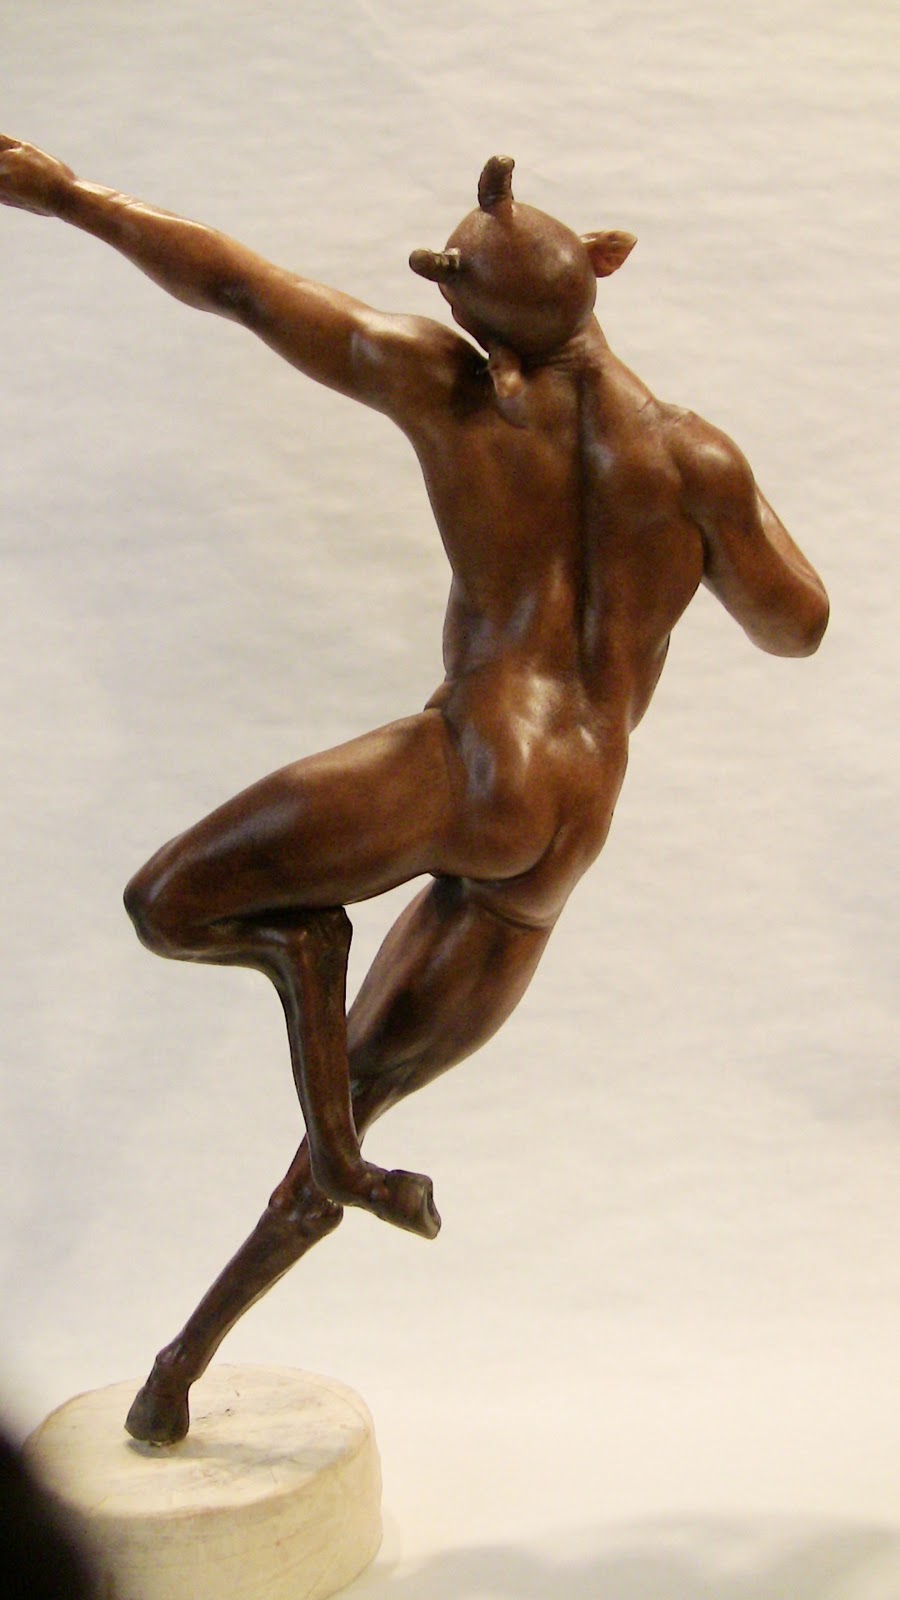
 I will use Windsor Newton water mixable oils to patina the skin for this figure. A mix of 4 parts Yellow Ocher, 2 parts Raw Umber, 1 part Raw Sienna are mixed straight from the tubes without diluting them.

 The paste is applied with a stiff brush.
 A mop brush is used to move the paint around a little more so there are no thick layers on the figure.
An old water color brush is used to stipple the surface and even-out the paint. I want to stain the skin more than paint it.
 Basic skin tone is done.
I add 2 parts Raw Umber to the mix and use that on the lower part of the leg. This is blended up into the upper leg.
 This same amended mix is used to add darker pigmentation to some areas for contrast.
 The finished base coat on the front. I have darkened the armpits, crotch, under the jaw, center line of the torso, and around the nipples.

And the back. I have darkened the back of the elbow, the spine, the crack of the backside, and base of the neck.

He will now go into the oven at 170 for 2 hours to accelerate the drying process so I can do the next step in the paint job. More on that later today (?) Maybe after a nap!
Have a great day!


 ** This is wet paint. The color will shift when it is dry. It will also lose the sheen.


ADDENDUM !!!
Wanted to add these since they are part of the painting for today. Sorry, I am working then posting in real time these days to keep up.
 He has come out of the oven and cooled down enough to work. Wanted to show that the drying need not take long if the paint is applied thinly.
The next step is to polish the surface with a soft cloth. This will add a slight sheen to the skin just like ours. It also removes any wet paint so if in doubt, wait a few days to do this!
 I hope you can see the difference in the polished surfaces here.
 I then add highlights with Adobe Red acrylic paint and a dry-brush technique to add some color back into the skin.

Next we will look at the eyes. Tata!