Saturday, April 9, 2011

"Demon" Prep Work

** Please remember that you are welcome to sculpt along but please alter your sculture so we are all making something unique. Thank you!

Lets look at scale, proportion, and the armature layout today.
 I want to use an eight year old child for this sculpture. the best way to find proportions for any age is to use an actual model. I have taken a photo of an eight year old child, and measured the lengths of the body parts then adjusted to a simple proportion chart which I can use for my own sculptures.
Using the head as my measurement, the torso is three heads high from crown to crotch. (1 head to chin, 2 heads to bottom of sternum, 3 heads to front of crotch - backside is slightly lower) The knee is one head down from the crotch however, keep in mind that the length of the upper leg is actually from the hip joint (see + sign) to the knee which is about 1.25 head height. The lower leg is also 1.25 head height from knee to ankle. Please note that this is a guide line I have established for myself from actual people. You may like a different set of proportions so go for it!

 Now that I have a proportion chart for the child, I need to decide what size he will be. I draw a few different sized figures and come up with the one on the left as my choice. He or she will be about 6" tall. Smaller = cute. This sketch is the actual size of my finished piece.
I will start this sculpt with a face so first I need a skull. The skull on the left is my standard adult skull. The one on the right has been altered for a child's head. The upper part of the skull is made slightly larger so the eyes sit about halfway down the face.The sides and bottom of the jaw are cut down so the lower jaw is smaller. The eyes are the same size bead so they will look bigger in the small face. Big eyes =cute.
The changes to the adult skull from the side. Note the larger cranium and smaller jaw as you compare the two skulls.
For details on creating a skull, please see my earlier post on sculpting the skull.


Here I have drawn my demon to the relative size I want for my finished piece. I want him larger than my child but not too over-powering. Also keep in mind the weight of the finished demon needs to be supported by one thin rod.


Once I have the final size of the demon, I can make his skull as well.
 His skull is simply a variation of the basic adult skull which I use for most of my sculptures. I have added more clay to the eyebrow, the cheeks, and the jaw.
 The lower jaw has clay added to the front to create an under-bite. It also has two sockets created so his fangs will fit into the jaw when done.
 The skull sized to the demon.

I use a very rough sketch to layout the load-bearing parts of the sculpture. This lets me simplify the sculpture into just the basics needed to support the weight of the demon and transfer the stress into the base.

 Now I can transfer my rough armature ideas into an actual armature layout on my sketch.
The body of the figure will be supported by my simple 14gauge wire armature (blue). The body will separate at the waist with the Octopus part of the figure staying attached to the support rod (red) to make shipping easier. The tentacles will be made of flexible clay over 18 gauge aluminum wires which will be attached to the rod.
This rod will insert into a brass tubing socket in the child's armature and into a brass tubing socket in the waist of the figure.
The child will be built in a similar manner: the body is supported by a simple 14G wire armature (blue), the lower leg and spine will have a solid rod running from the shoulder to the base (red), and the shoulder will have a socket connected to the lower rod into which the demon's support rod will insert.


I hope I have explained the design well so far. Next time we will start making the armature. Please feel free to email me with photos and questions if you need help (madsculptor@verizon.net). I will post again on Monday so you have time to design and layout your armatures before we continue. If you need more time, let me know and we will attempt to adjust to the majority of those following along.
Have a great day!
Mark

Friday, April 8, 2011

HERE WE GO!

Well, only got 19 responses from  300+ followers so we will use some of those ideas for the next sculpture. Thanks to those who suggested things; some a bit odd, some intriguing.
Here it is:
This is my design for a piece I like to call "Exercise Your Demon". It shows that most scary things seem silly when taken out into the open. (Homage to my wife the psychotherapist)
So here is what we will be addressing from your list of wants:
1. A small child in action (we will look at the proportions of the child). We will also cover putting clothes on a full figure sculpt.
2. An armature for a more complex set of figures where the largest figure seems to have little support.
3. More expressive faces.
4. A hybrid creature- in this case a sumo wrestler and an octopus.
5. Tentacles and how to get them to not break for shipping.
6. Sculpting a "nightmare".
7. Maybe we can add a tattoo to the critter just because you asked so nicely.

Sorry that we won't be getting to the Equine hybrid for those who asked. Good idea, maybe later this year.
This is the rough design. Hopefully the final piece will flow a little better. I definitely do better with sculpture than I do sketches.
We will start next time with laying out and creating the armature for this piece.
Have a great day!
Mark

Wednesday, March 30, 2011

Adding interest to the basic sculpt.

As I look at these figures, I realize just how boring they are. So lets look at a few ways to make them a bit more interesting now that they are fully sculpted and the damage is done.
Here they are, the basic figures which looked so good to me as I was creating them now look so plain. As the dressing is finished, you will notice that the pictures make his neck and arm look longer. Part of this is the camera and part of this is just that I made him a little long.


 Sorry, bad picture. To start the process of adding more interest, I want to age the clothing slightly. The right leg has been sanded to add wear spots to the folds of the leather pants and worn spots on the shoes. The left leg is still brand new.

A wash of Raw Umber and Retarder/Extender is used to add "dirt" to the pants and boots. this is only on the left side right now to show contrast. The Raw Umber mix is worked into the creases and folds to add shadow and accumulated dirt to the seams. Once they are dry, I will sand the high spots again and touch up with the wash in a series of layers until the clothing has a used look.


Before I proceed, let explain the thought process here. I want to add interest to the piece while shifting focus from the issues I see in the figures; namely the seemingly long neck and arm of the male. I thought about just adding a collar to the shirt but the piece was still boring so I came up with the idea of using a cape. I don't want to cover her with a cape as well so my thought is to use his cape to encircle her as a form of protection from a sudden spring rain. The cape flowing in the wind with a bit of rain or sleet would add some interest to the piece and allow me to shift the eye away from the issues I see.
The cape is made of a coarse cotton fabric from a pair of worn pants. I have sewn a hood onto the top and added a very roughly sewn hem with a pocket on the edge.
The cape is roughed up with a coarse sanding pad to add wear to the fold and hem.
The same Umber wash is used to dirty the hemline.
Finally, a wire is inserted into the pocket of the hem.
The finished cloak can now be posed around the figures.


 The figures are separated and the robe is pinned in place so I can figure out how to get the figures back together with the robe on and so I can shape the folds as I want.
 I work my way around the piece making adjustments as I go.
The female is put in place and the posing of the cloth continues.
 Now, I have the pose so I start gluing parts of the cloak together and pinning and clamping them until the glue sets.

The finished pose of the cloak.
 And from the rear.


The last step is to add some sleet/rain to the figures. I want the start of a spring shower so I used Gallery Glass and a tooth brush to spatter the figures from behind and above the male. This image shows the heavier deposit of "rain" on the cloak where his head and her arm (under the cloth) keep the cloak in place. This is where the rain will soak in first rather than the entire cloak. Her face and hair also get slightly spattered with the Gallery Glass so she ends up with beads of rain in her hair.

If you look closely, you can see the pattern of wet spots on the silk dress where it is not sheltered by his cloak.
 The cloak hugs his figure as the wind whips it around them both.

Thanks for joining me today.
Have a great day.
Mark

Tuesday, March 29, 2011

Dressed male

Took some time last night to dress the male figure.
 He has a silk shirt, leather pants and shoes.
Last bit of work will be to age the materials a bit and add any accessories.
Thanks for looking, have a great day.

Monday, March 28, 2011

Two figure sculpt update

Sorry for not getting to post as often as I would like. Hope to get back to sculpting and posting more in the near future. In the mean time, here is the ongoing work on the basic sculpts.
 She has been dressed in a roman styled garment which is modeled after one from the movie King Arthur.
The dress is recycled silk with and edging that has small eyelets sewn into it.

 The empire waist is accented with a length of ornamental trim which is slipped through a pewter buckle. The ends are finished in red wooden and white and blue mottled glass beads.

The back has a set of panels sewn in to add fullness. They are a little flattened right now but will be fluffed a bit once he is in place.


Here is a close up of the finished face and details.


The shoulder ties are made from two metal head pins which are interlocked and hooked through an eyelet at the shoulder seam of the dress.

More on the male next time. Have a great day!
Mark

Monday, March 21, 2011

Update: simple armaturen in use (contains artistic nudity)

I had a few folks ask about seeing updates on this piece so here they are painted and with hair and eyes.


Sunday, March 20, 2011

Enough about the simple armature already1

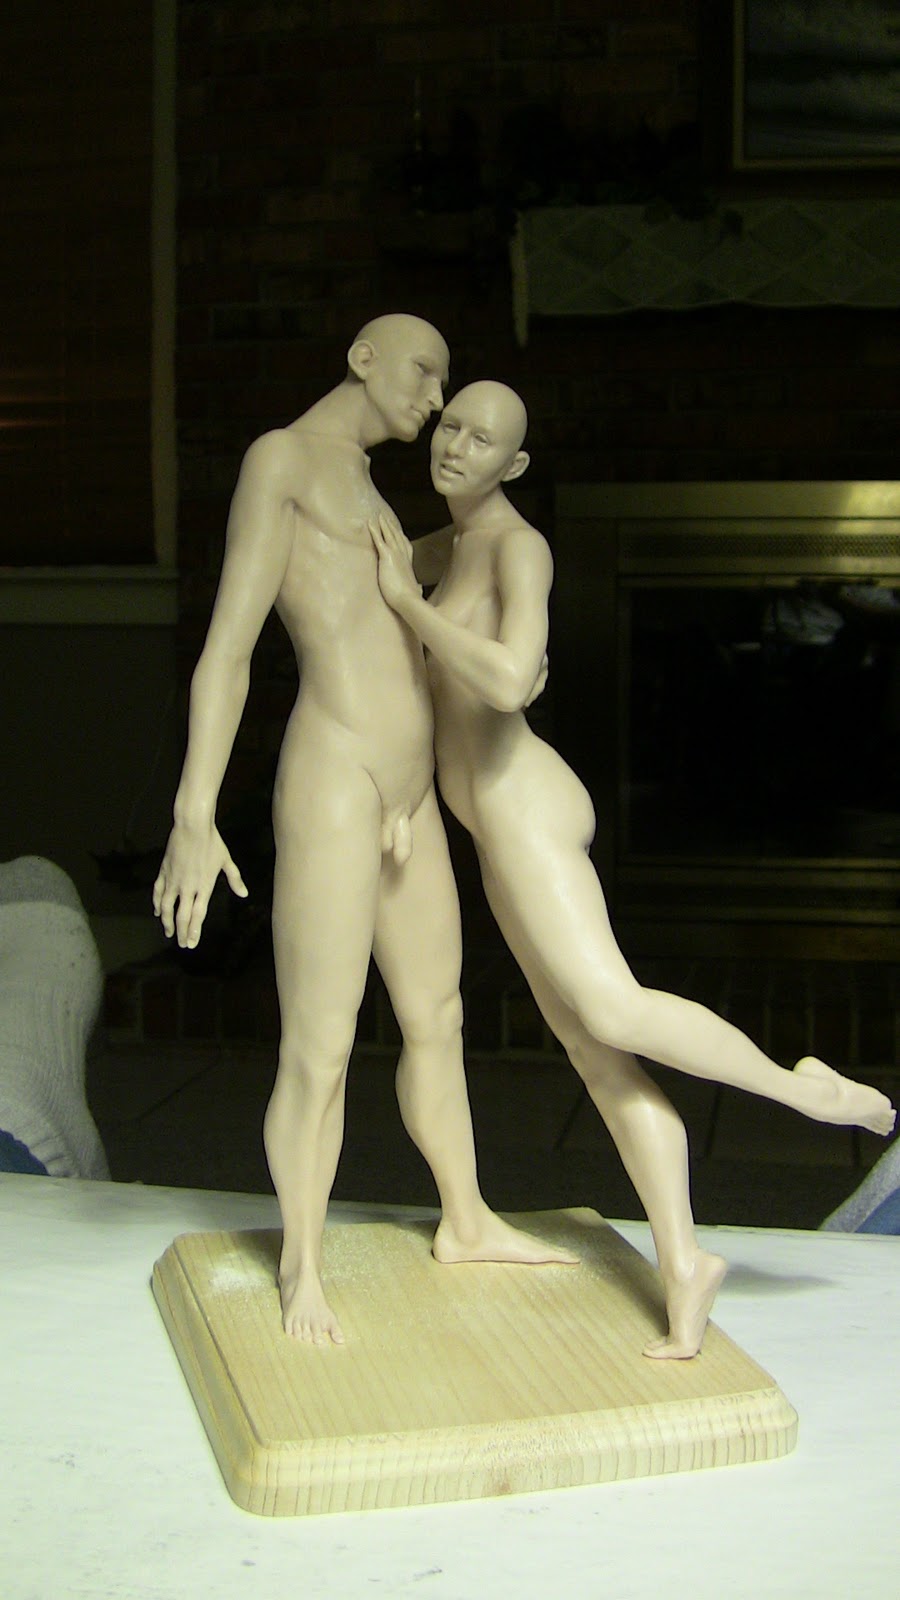
Working on these two figures and decided that I would put them on the blog as an example of using the simple armature.
 Each of these figures uses the simple wire armature laid out in previous blogs. The armatures have tubes on the wire in the legs only.
The wires in the arms stop just inside the palm of the hand so the figures can be separated from each other.
Once the figures were sculpted as separate pieces, they were lightly dusted with baby powder so they could be worked together without the clay fusing them to each other.
The hands were added after the figures were intertwined.
His arm has been raised to her elbow, I'll show you that later.
Have a great day!